Plan the fence as a complete system: layout, supports, conductors, energizer, ground return and testing. Use the instructions for your exact equipment; a wire-height chart or a ground-rod count alone is not an installation specification.
Overview
Electric fencing is one of the most efficient and cost-effective livestock containment systems when properly installed. However, performance depends heavily on correct wire spacing, grounding systems, energizer sizing, post selection, and vegetation control.
This Electric Fence Installation Guide explains step-by-step installation methods for permanent and temporary electric fencing, grounding layouts, wire configurations, energizer selection, voltage testing, and maintenance planning. It is designed for cattle producers, sheep and goat farms, horse owners, and predator-control applications.
This guide focuses specifically on installation strategy and system layout—not just energizers or fence materials alone. For detailed energizer information, see the Electric Fence Chargers & Energizers Guide. For material options, review the High Tensile Wire Guide and Woven Wire Field Fence Guide.
What This Guide Covers
Installation sequence: plan, assemble, then test
- Define the job. Record livestock species and age, perimeter versus paddock division, fence length, gates, terrain and dry-season conditions. Confirm boundaries and underground services before driving posts or rods.
- Choose a compatible system. Keep the energizer manual, conductor instructions and post/bracing plan together. Do not transfer a permanent high-tensile wire specification to portable polywire or netting.
- Prepare the work area. Keep people and livestock away while assembling the fence. Disconnect the energizer from its power source before making or changing connections.
- Build supports before tensioning. Complete the specified end and corner assemblies, then fit line posts, insulators and conductors. Use purpose-built wire handling and tensioning tools; do not use a vehicle as a tensioner. See Bekaert's high-tensile installation guide for its equipment and handling precautions.
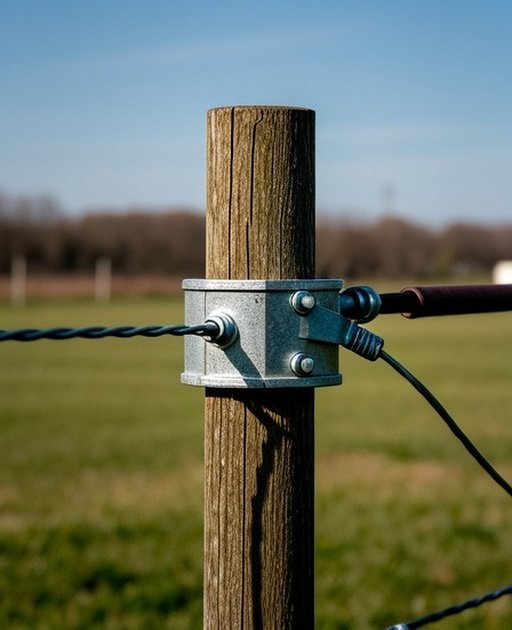
- Connect the two paths correctly. The fence terminal supplies the live conductor; the earth terminal connects to the designated ground system. Match cable and connectors to the equipment instructions. See the Zareba charger-location guide before mounting its equipment.
- Commission before adding animals. Inspect the full line, remove accidental contacts, then test with a purpose-built electric-fence tester. Record the energizer model, test locations, readings and ground conditions so later faults can be compared with a known starting point.
Electric Fence Layout Planning
Effective electric fence installation starts with a site map showing existing structures, water sources, terrain features, and planned paddock divisions. Mark the energizer location first — it should be inside a building or covered enclosure, within reach of the fence line, and accessible to power (AC outlet for mains-powered or open sky for solar). The energizer location determines where the main fence lead connects and where the ground rod system is installed.
Run perimeter fencing first, then add interior cross-fencing for paddock division. The main fence perimeter serves as the backbone; interior cross-fencing connects to it using gate handles or T-posts with insulators. Plan gate locations to allow tractor and equipment access (12–16 foot openings minimum) and pedestrian access (4-foot gates). Sketch the layout on paper before driving any posts — changes are free at the planning stage.
Wire Spacing by Livestock Type
Wire strand placement varies significantly by livestock species. For beef cattle: strands at 14, 28, and 44 inches for a 3-strand configuration, or add a strand at 8 inches near the ground for calves. For horses: high-visibility tape at 24 and 48 inches (or board fence with single electric offset at chest height). For sheep: strands at 6, 14, 24, and 34 inches to contain both lambs and ewes effectively. For goats: strands at 8, 16, 26, and 38 inches plus electric inside any physical fence.
Bottom strand height is the most critical specification — too high and calves, lambs, or small animals go under the fence. The bottom strand should be 8–10 inches from the ground for cattle, 6 inches for sheep, 8 inches for goats. In snow country, raise the bottom strand to 12–14 inches to prevent snow from shorting the fence in winter, and add a lower strand during snow-free months if containment of young stock is needed.
Grounding System Installation
Proper grounding is the single most important and most misunderstood aspect of electric fence installation. An electric fence operates by completing a circuit through the animal, the ground, the ground rods, and back to the energizer. Poor grounding means incomplete circuits, weak shocks, and failed containment — even with a powerful energizer. The grounding system must be installed with as much care as the fence itself.
Ground-rod count, length, spacing and compatible materials must come from your energizer instructions and site conditions. For example, Zareba's grounding guide describes three 6–8-foot rods spaced 10 feet apart; that is a manufacturer example, not a universal minimum for every portable or permanent system. It also requires a separate fence ground system, not a connection to a building's utility earth. Dry, rocky or sandy sites may need a different return arrangement.
Do not confuse fence voltage with ground-system voltage
A live-wire reading is not the same test as checking the ground system. Gallagher's all-live-wire ground test first applies a load at least 330 feet from the ground system, reducing fence voltage there to 2 kV or less. It then measures between the ground-system connection and an independent probe about 3 feet away. Its 0.2 kV limit applies to that ground-system reading—not to a normal live fence wire. Follow the complete manufacturer procedure and tester instructions; switch off before changing connections or rods. Ground-return-wire fences use a different test.
Choosing the Right Energizer
Do not choose an energizer from acreage or a fixed “joules per mile” rule alone. Animal type, powered distance and number of wires affect selection, as explained in Gallagher's electric fencing basics. Give the supplier your conductor type, expected vegetation load, power supply and seasonal soil conditions, and ask for a model-specific recommendation.
A larger energizer does not remove the need to repair shorts, damaged insulators or inadequate grounding. Compare equipment using the manufacturer's stated rating basis and operating conditions, then confirm performance on the installed fence.
High-Tensile Electric Fence Setup
Permanent high-tensile electric fencing uses a designed combination of smooth wire, end and corner braces, line posts and strainers. The wire manufacturer's tension range and the site-specific support plan govern installation; there is no single post spacing or pulling force suitable for every fence. Use the wire tensioning guide to identify the relevant questions before tightening.
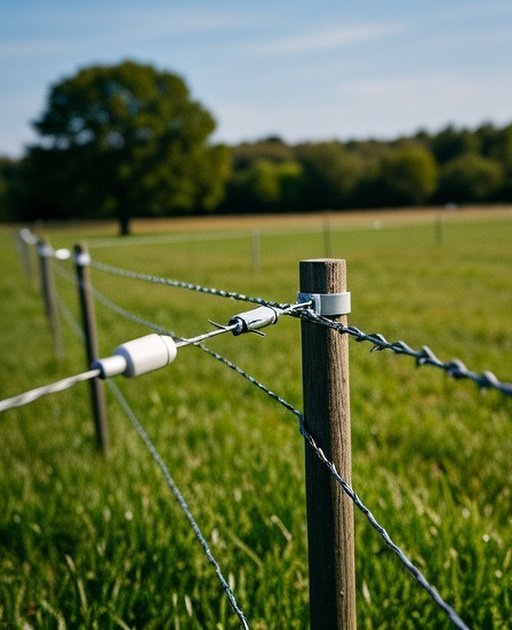
Insulate at every post contact point — T-posts use clip-on or wrap-around insulators, wooden posts use screw-in or nail-in insulators. Use quality UV-stabilized plastic insulators; cheap white plastic insulators crack after 2–3 years of sun exposure and create fence shorts. Check all insulators annually and replace any showing cracking or yellowing. Faulty insulators are a leading cause of chronic low-voltage problems on aging electric fence systems.
Electric Fence Layout Planning
Plan the perimeter, paddock divisions, gates and energizer connection before ordering components.
Read more →Wire Spacing by Livestock Type
The electric fence wire spacing chart provides species-specific recommendations for strand count and vertical spacing.
Read more →Grounding System Installation
Understand the ground return path and match the installation to the energizer and soil conditions.
Read more →Choosing the Right Energizer
Choosing the right energizer requires matching joule output to fence length, wire type, vegetation load, and livestock species.
Read more →High-Tensile Electric Fence Setup
Plan permanent wire, braces and strainers using the selected manufacturer's installation specification.
Read more →Temporary Electric Fence Installation
Compare portable conductors, reels and posts for moving paddock divisions.
Read more →Corner & End Post Bracing
Corner and end post bracing is essential for permanent electric fence systems using tensioned wire.
Read more →Electric Fence Voltage Testing
Electric fence voltage testing should be performed weekly during active use and after storms to ensure adequate shock delivery.
Read more →Lightning Protection & Surge Safety
Lightning protection and surge safety systems prevent expensive energizer damage from electrical storms.
Read more →Electric Fence Troubleshooting
Separate energizer, ground-return and fence-line faults before replacing equipment.
Read more →Common Decision Scenarios
If You Need Low-Cost Fencing
Compare complete bills of materials for the same job: conductor, supports, braces, gates, lead-out cable, energizer, grounding, tester and installation labor. A portable subdivision and a permanent boundary do not provide equivalent service simply because they enclose the same acreage.
For movable paddocks, evaluate a purpose-designed portable system. Do not assume step-in posts can anchor tensioned high-tensile wire. Request local itemized prices after the layout is settled instead of treating a generic cost per foot as a quotation.
If You Want Minimal Maintenance
For lowest ongoing maintenance on electric fence, invest upfront in quality components: galvanized T-posts (not painted, which rust through the zinc coating), quality UV-stabilized insulators, a commercial-grade low-impedance energizer with lightning diverter, and a proper ground system with 4+ ground rods. These components require inspection but rarely need replacement for 10–15 years.
Vegetation management is the primary ongoing task — trim or spray vegetation under and around the fence 2–4 times per season. Install the fence so the lowest wire clears the normal grass height by 2–4 inches, reducing but not eliminating vegetation contact. Some operators use a strip of gravel or bare soil under the fence line to minimize vegetation growth at the base.
If You Need Low-Cost Fencing
Compare complete system costs, not wire price alone.
Read more →If Predator Pressure Is High
For predator control, add offset hot wires outside perimeter fencing at nose height (6–10 inches) and near ground level.
Read more →If Terrain Is Uneven
Electric wire adapts better to uneven or sloped terrain than rigid fencing systems like woven wire or wood boards.
Read more →If You Want Minimal Maintenance
Permanent high-tensile electric systems require less repair and re-tensioning than temporary netting or polywire installations.
Read more →Key Design & Planning Considerations
Fence Height & Spacing
Fence height and strand spacing depend on livestock type and training level. Cattle often require 2–4 strands reaching 40–48 inches total height, while sheep may require 5–7 closely spaced strands (6–10 inch intervals) reaching 40–45 inches to prevent slipping through gaps.
Proper spacing ensures animals respect the fence without needing continuous physical barriers. Bottom wire height is critical—typically 8–12 inches above ground for cattle and 6–8 inches for smaller livestock. Closer spacing near ground level prevents young animals from crawling under.
Safety Factors
Do not interpret a voltage number as a guarantee of safety. Use an energizer designed for the application, follow its warnings and installation manual, and keep people and animals clear during work. Never test the fence by touching it. Isolate its power before handling conductors or changing connections; use a tester rated for electric-fence pulses when checking operation.
Proper grounding and insulation are critical for safety compliance. Install warning signage at access points, use insulated lead-out cables from energizers, and ensure all connections meet manufacturer specifications. For safety standards and regulations, see the Energizer Guide.
Cost & Maintenance
Electric fencing has lower material cost than woven wire—typically $1–$4 per linear foot installed compared to $3–$8 for mesh systems. However, it requires ongoing vegetation management to prevent short circuits that drain voltage and allow livestock escapes.
Annual costs include vegetation control (mowing, herbicides, or grazing management), periodic voltage testing, occasional wire and insulator replacement, and energizer maintenance or battery replacement. For comprehensive cost planning, see the Fence Cost & Budgeting guide.
Installation Complexity
Permanent high-tensile systems require tensioners, insulators, suitable corner braces, and a correctly installed ground system. Ask an experienced installer to review the support design if terrain or soil conditions make the standard instructions unsuitable.
Temporary systems are easier to install—step-in posts and portable conductors require minimal tools and skills—but need frequent monitoring and adjustment. For installation guidance, see the Fence Planning Basics guide.
Legal & Boundary Considerations
Electric fences near public roads, residential areas, or recreational trails may have regulatory requirements including warning signage, voltage limitations, or minimum setback distances. Some jurisdictions restrict electric fencing in certainzones due to safety concerns.
Shared boundary fences may require neighbor notification or agreement, particularly when electrifying existing non-electric fences. Always verify local ordinances and property boundaries before installation. For legal planning guidance, see the Local Fence Laws & Regulations guide.
Related Fence Systems
- Electric Fence Chargers & Energizers Guide – Power system selection
- High Tensile Wire Fencing Guide – Permanent tensioned systems
- Woven Wire / Field Fence Guide – Physical containment alternative
- Wildlife & Predator Fencing Guide – Predator deterrence strategies
- Fence Cost & Budgeting Guide – Cost planning tools
- Fence Planning Basics Guide – Layout fundamentals
Frequently Asked Questions
How many strands are needed for cattle?
Typically 2–4 strands provide adequate containment for cattle depending on animal temperament, training level, and whether the fence is perimeter or subdivision.
How deep should electric fence posts be?
Posts should be set 2–3 feet deep for permanent systems, with corner and end posts going 3–4 feet deep to withstand tension loads—deeper in loose or sandy soils.
How many ground rods are required?
Use the energizer manufacturer's specification, then verify it with the appropriate ground-system test. Rod count alone cannot establish adequacy. Permanent and portable systems may differ; Premier 1's grounding guidance also explains how rod length, output and soil conditions affect the choice.
Can electric fencing work without grounding?
No—grounding is essential for proper voltage return and shock delivery. Without adequate grounding, the electrical circuit cannot complete and animals won’t receive effective correction.
How often should voltage be tested?
Voltage should be tested weekly during active use and immediately after storms to ensure adequate shock delivery and identify shorts before animals discover weak sections.
Final Recommendations
Before buying a larger energizer: isolate the fault
If a new installation has low voltage, first distinguish equipment output from a fence-line fault. Premier 1's troubleshooting sequence tests the energizer separately, then progressively reconnects fence sections to locate a voltage drop. Switch off before disconnecting or reconnecting wires, and use the tester and thresholds specified for your equipment. Inspect suspect sections for conductor contact with soil or metal, damaged insulators and vegetation. Check the ground return as a separate step.
Keep a commissioning record
- Energizer make/model, power source and conductor type.
- Ground-rod layout, connection materials and test procedure used.
- Readings at the supply end, remote end and each paddock branch.
- Date, soil conditions, vegetation load and defects corrected.
- Manufacturer's target readings and the next inspection trigger.
This record gives you a practical reference after dry weather, storms or an extension to the fence. It does not replace the equipment manual or an installer’s safety assessment.
Turn your layout into a cattle-fence specification
If your installation plan is for cattle, use the CattleFenceWire selection guide to compare the fence approach before requesting specifications. Take your livestock details, line length, terrain and gate plan with you. LivestockFencingHub and CattleFenceWire are operated by the same team; this is a commercial next step, not an independent endorsement.
Electric fence installation must be approached as a complete system—not just wire and an energizer. Proper layout planning, correct wire spacing, sufficient grounding, and appropriate energizer sizing determine long-term effectiveness and livestock containment reliability.
For permanent perimeter fencing, consider high-tensile multi-strand systems that provide 20+ years of service with minimal maintenance. For rotational grazing and flexible livestock management, portable electric fencing offers installation flexibility and cost efficiency.
Always pair installation strategy with proper voltage monitoring and maintenance planning to ensure reliable containment. Use the linked guides above to evaluate costs, compare system types, learn bracing techniques, and troubleshoot performance issues for optimal electric fence performance.